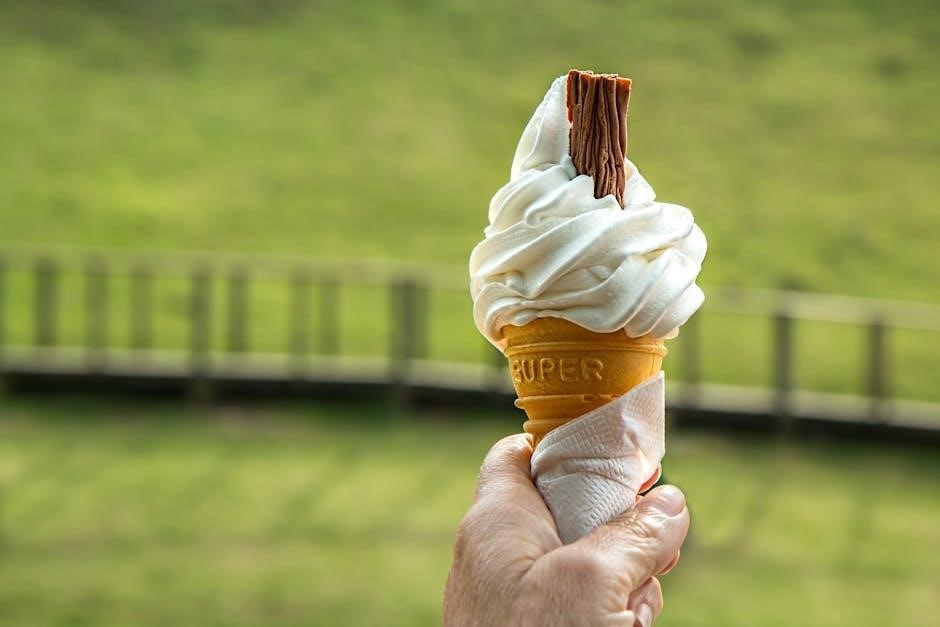
The Nostalgia Electrics Ice Cream Maker is a charming, retro-style appliance designed for homemade frozen treats. With a 4-quart capacity and easy-to-use design, it combines nostalgia with modern convenience, perfect for family fun and delicious creations. The included manual provides clear instructions, recipes, and tips for crafting creamy ice cream, sorbet, and more.
Overview of the Product
The Nostalgia Electrics Ice Cream Maker is a retro-inspired appliance designed for crafting homemade frozen treats with ease. Available in models like the ICMW400, it features a 4-quart capacity, perfect for family-sized batches. The unit combines a wooden bucket with an electric motor, requiring ice and salt for operation. Its classic design blends nostalgia with modern functionality, making it a charming addition to any kitchen. The maker supports the creation of ice cream, sorbet, and gelato, offering versatility for various tastes. The included manual provides detailed instructions, recipes, and safety guidelines, ensuring a smooth and enjoyable experience for users of all skill levels.
Key Features and Benefits
The Nostalgia Electrics Ice Cream Maker offers a 4-quart capacity, ideal for making large batches of homemade ice cream. Its electric motor simplifies the churning process, while the traditional wooden bucket design adds a nostalgic touch. The unit requires ice and salt for operation, ensuring a classic, creamy texture. Key benefits include easy assembly, a durable construction, and a comprehensive manual with recipes and troubleshooting tips. The maker is versatile, supporting the creation of ice cream, sorbet, and gelato. Its compact size and retro aesthetics make it a charming addition to any kitchen, perfect for families and ice cream enthusiasts alike.
First Impressions and Design
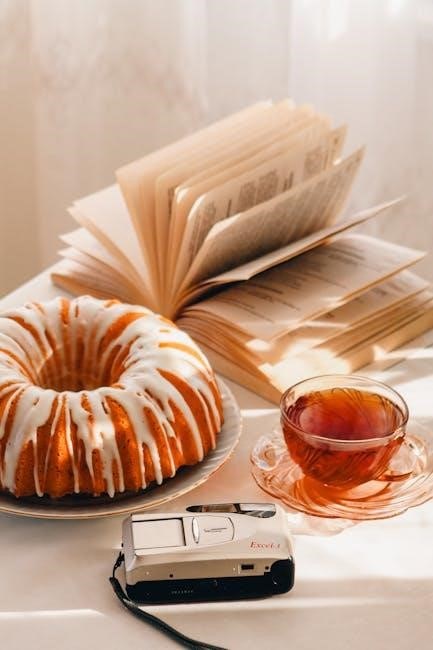
The Nostalgia Electrics Ice Cream Maker captivates with its retro-inspired design, blending classic aesthetics with modern functionality. The wooden bucket and vintage-style accents evoke a sense of nostalgia, while the compact footprint fits seamlessly into most kitchens. Upon unboxing, the sturdy construction and high-quality materials leave a lasting impression of durability. The design is both visually appealing and user-friendly, making it approachable for first-time users. The retro charm and straightforward assembly process create an exciting experience, inviting users to embrace the joy of homemade ice cream. Its timeless look and functional design make it a delightful addition to any home, perfect for families and ice cream enthusiasts alike.
Safety Precautions and Important Information
Always read the manual before use. Keep children away from hot surfaces and moving parts. Ensure the unit is placed on a stable, flat surface near an electrical outlet.
General Safety Guidelines
Before using the Nostalgia Electrics Ice Cream Maker, read the manual thoroughly. Ensure all users understand the safety precautions to avoid accidents. Keep children away from hot surfaces, moving parts, and electrical components. Place the unit on a stable, flat surface to prevent tipping. Avoid overloading the machine, as this can cause damage or malfunction. Never leave the ice cream maker unattended while in operation. Use protective gloves when handling hot or sharp parts. Regularly inspect the cord and plug for damage. Follow all voltage and power specifications to ensure safe operation. Proper maintenance and storage are essential for longevity and safety.
Specific Warnings and Cautions
Avoid inserting metal objects or hands into moving parts to prevent injury. Keep children away from the machine while it is in operation. Do not leave the unit unattended during use. Ensure the ice cream maker is placed on a stable, heat-resistant surface. Never submerge the electrical motor or plug in water. Avoid using abrasive cleaners, as they may damage the finish. Do not operate the machine near open flames or sparks. Always unplug the unit before cleaning or performing maintenance. Follow the recommended ingredient quantities to prevent overflow. Keep the machine out of reach of children to avoid accidental start-ups or tampering.
Handling and Storage Tips
After use, wash all detachable parts with warm, soapy water and dry thoroughly to prevent rust or bacterial growth. Avoid using abrasive cleaners or scourers, as they may damage the finish. Store the ice cream maker in a cool, dry place, away from direct sunlight. Keep the unit out of reach of children to prevent accidental damage or injury. Regularly inspect the machine for wear and tear, and replace any damaged parts promptly. For long-term storage, ensure all components are clean and dry before packing. Always refer to the manual for specific storage instructions to maintain the product’s longevity and performance.
Assembly and Parts of the Ice Cream Maker
The Nostalgia Electrics Ice Cream Maker includes a bucket, canister, lid, and accessories. Assembly involves unpacking, washing, and arranging components as per the manual instructions for proper setup.
Unpacking and Identifying Components
When you unbox your Nostalgia Electrics Ice Cream Maker, you’ll find a bucket, canister, lid, and additional accessories. Carefully unpack each part, ensuring no damage occurred during shipping. Identify the main components: the electric motor base, the churn lid, and the mixing canister. The bucket is typically made of durable materials, while the canister is designed for easy mixing. Before first use, wash all parts (except the electric motor) with a non-abrasive cloth or sponge. This ensures cleanliness and prepares the machine for making delicious homemade ice cream. Always refer to the manual for specific unpacking and preparation instructions to guarantee safe and proper setup.
Step-by-Step Assembly Instructions
Begin by placing the canister into the bucket, ensuring it fits securely. Next, align the electric motor base with the bucket’s top rim and gently press it into place until it clicks. Attach the churning paddle to the motor shaft, making sure it is properly secured. Place the lid on the canister, aligning the holes for the paddle to rotate freely. Plug in the unit and test the motor to ensure smooth operation. Follow the manual’s diagrams for precise alignment and assembly. Once assembled, your Nostalgia Electrics Ice Cream Maker is ready for use. Always refer to the manual for specific assembly details to ensure safety and functionality.
Understanding the Machine’s Parts
The Nostalgia Electrics Ice Cream Maker consists of several key components. The electric motor powers the churning process, while the canister holds the ice cream mixture. The bucket, typically made of wood or plastic, houses the canister and is filled with ice and rock salt to chill the mixture. The lid ensures a secure fit during churning, and the churning paddle rotates to aerate and mix the ingredients. Additional parts include the handle for easy carrying and a locking mechanism to keep the motor in place. Understanding each part’s function ensures proper assembly and operation, leading to perfectly churned homemade ice cream.
Operating Instructions for the Nostalgia Electrics Ice Cream Maker
Pre-freeze the bowl, mix ingredients, and assemble the machine. Add ice and salt, pour the mixture, and churn until thickened. Monitor progress for desired consistency and flavor.
Pre-Freezing and Preparation
Before using the Nostalgia Electrics Ice Cream Maker, ensure the freezer bowl is pre-chilled for at least 24 hours. Wash the bucket, canister, lid, and accessories with a non-abrasive cloth. Dry thoroughly to prevent water spots. Place the bowl in the freezer, away from direct sunlight, to maintain even chilling. While waiting, prepare your ingredients according to the recipe. This step ensures the machine operates efficiently and produces smooth, creamy results. Proper preparation is key to achieving the best flavor and texture in your homemade ice cream.
Mixing and Adding Ingredients
Combine your ingredients in a bowl, ensuring the mixture is well-blended and chilled. Pour the mixture into the pre-chilled freezer bowl, leaving about 1 inch of space at the top. Avoid overfilling to prevent spillage during churning. For mix-ins like fruits, nuts, or candy pieces, add them midway through the churning process. This ensures even distribution without damaging the ingredients. Use the machine’s lid to maintain consistency and prevent contamination. Always follow the recipe guidelines for ingredient ratios to achieve the best results. Proper mixing and ingredient addition are crucial for smooth, flavorful ice cream.
Churning and Monitoring Progress
Once the machine is assembled and ingredients are added, secure the lid and turn it on. The churning process typically takes 20-30 minutes, depending on the mixture. Monitor the consistency through the lid’s opening. The machine may make a knocking sound as it churns, which is normal. As it progresses, the mixture will thicken and turn into a smooth, creamy texture. Avoid opening the lid too soon, as this can disrupt the process. Once the ice cream reaches your desired consistency, turn off the machine. Scoop and serve immediately for the best results, or transfer to an airtight container for freezing.

Recipes and Customization Options

Explore classic vanilla, unique flavor variations, and creative mix-ins. Customize your ice cream with fruits, nuts, or candy for personalized treats. Troubleshooting tips ensure perfect results.
Classic Vanilla Ice Cream Recipe
Start with the timeless classic vanilla recipe. Combine 2 cups of heavy cream, 1 cup of whole milk, 1/2 cup of granulated sugar, and 1 tsp of pure vanilla extract. Mix well until sugar dissolves. Chill the mixture in the refrigerator for 1-2 hours. Pour into the pre-chilled ice cream maker bucket and churn according to the manual’s instructions. Churn for 20-30 minutes until thick and creamy. Transfer to an airtight container and freeze for 2 hours to firm up. Enjoy smooth, homemade vanilla ice cream perfect for toppings or mix-ins. This recipe is a foundation for endless customization.
Flavor Variations and Mix-Ins
Elevate your ice cream game by experimenting with flavor variations and mix-ins. Try adding cocoa powder for chocolate ice cream or espresso for a coffee twist. Mix-ins like chocolate chips, nuts, or fruit create unique textures and tastes. Fold in fresh berries for a fruity twist or swirl in caramel for a sweet surprise. The manual suggests adding mix-ins during the last 2 minutes of churning for even distribution. For a tropical vibe, incorporate coconut milk or pineapple chunks. Let your creativity shine by combining flavors like mint extract with chocolate chips or lemon zest with raspberries. The possibilities are endless, making every batch a new adventure!
Troubleshooting Common Issues
If your ice cream isn’t churning properly, ensure the freezer bowl is fully pre-chilled and the machine is on a stable surface. Check that the lid is securely closed to avoid leaks. If the motor stops, it may be overloaded—remove some mixture and restart. For icy textures, adjust the ingredient ratios, ensuring enough sugar and fat for creaminess. If the machine doesn’t turn on, verify it’s properly plugged in and the outlet is working. Refer to the manual for specific troubleshooting guides tailored to your model. Addressing these common issues ensures smooth operation and perfect results every time.
Maintenance and Cleaning
Regularly clean the Nostalgia Electrics Ice Cream Maker with a non-abrasive cloth and mild detergent. Avoid abrasive cleaners to prevent damage. Dry thoroughly after washing to prevent rust and ensure longevity. Store the machine in a dry place when not in use to maintain its performance and appearance.
Post-Use Cleaning Procedures
After each use, wash the bucket, canister, lid, and accessories with a non-abrasive cloth or sponge and mild detergent. Avoid using abrasive cleaners or scouring pads, as they may damage the surfaces. Rinse thoroughly and dry with a clean towel to prevent water spots and rust. The electric motor and plug should not be washed. For tough residue, mix equal parts water and white vinegar, soak for 10 minutes, then scrub gently. Regular cleaning ensures optimal performance and prevents bacterial growth. Always store the cleaned components in a dry place to maintain hygiene and longevity.
Long-Term Storage Tips
For long-term storage, ensure all components of the Nostalgia Electrics Ice Cream Maker are clean and dry. After cleaning, store the bucket, canister, and accessories in a cool, dry place away from direct sunlight. Avoid stacking heavy items on the bucket to prevent damage. The electric motor should be stored separately, protected from dust and moisture. Cover the unit with a breathable cloth or plastic cover to keep it dust-free. Before storing, apply a thin layer of food-safe oil to any metal parts to prevent rust. Regularly inspect stored components for signs of wear or damage. Always refer to the manual for specific storage recommendations to maintain the product’s longevity and performance.
Troubleshooting Mechanical Issues
If the motor stops turning, ensure the unit is properly assembled and the mixture is not too thick. Check the power cord and outlet for connectivity issues. If the ice cream is too soft, the canister may not be frozen enough—refreeze for 24 hours. For uneven freezing, scrape the mixture with a spatula and restart churning. If the machine overheats, unplug it and let it cool before resuming. Regularly inspect and clean moving parts to prevent jamming. Lubricate gears if specified in the manual. For persistent issues, consult the troubleshooting section of the manual or contact customer support for assistance.
The Nostalgia Electrics Ice Cream Maker offers a delightful way to create homemade treats, blending retro charm with modern functionality. Its ease of use and customizable recipes make it a perfect addition to any kitchen, ensuring countless hours of family fun and delicious results.

The Nostalgia Electrics Ice Cream Maker is a 4-quart electric model designed for homemade frozen treats. It combines retro aesthetics with modern functionality, offering a fun and easy way to create customizable ice cream. The included manual provides detailed instructions, recipes, and safety guidelines, ensuring a smooth experience for users. Key features include a pre-freezing requirement for the bowl, simple assembly, and a family-friendly design. The maker supports various ingredients and mix-ins, allowing for creative flavor variations. With proper care and maintenance, it delivers consistent results, making it a delightful addition to any kitchen for ice cream enthusiasts.
Encouragement for Creative Use
Unleash your creativity with the Nostalgia Electrics Ice Cream Maker by experimenting with unique flavors and ingredients. Try adding fresh fruits, nuts, or candy pieces for personalized treats. The manual provides inspiration and troubleshooting tips to help you craft perfect batches every time. Whether you’re making classic vanilla or adventurous mix-ins, this maker empowers you to create memorable desserts. Don’t hesitate to explore beyond traditional recipes—try vegan options or seasonal flavors to keep your creations fresh and exciting. With this versatile tool, the possibilities for delicious, homemade ice cream are endless, making it a joy for both beginners and experienced makers.